Whew! Life has been a whirlwind of excitement around here! We were blessed to spend time with our families through the holidays, BeechBunch was busy with a surge of holiday orders, and as we headed into the new year, I realized I had not planned my son's 8th birthday party for the beginning of January! Eek!
So, Caleb and I started talking about what type of party would be cool...Angry Birds? Skylanders? nah...how about a MAD SCIENTIST party?!? YES!
(Be prepared for many, many, many photos!)
So, I got to researching ideas, decorations, experiments, and so forth. First step was designing his party invitation. I LOVE how they turned out! And you can find them here!
Keeping with our science theme, I wanted a
birthday banner that had periodic table references. I think the final product turned out perfect!
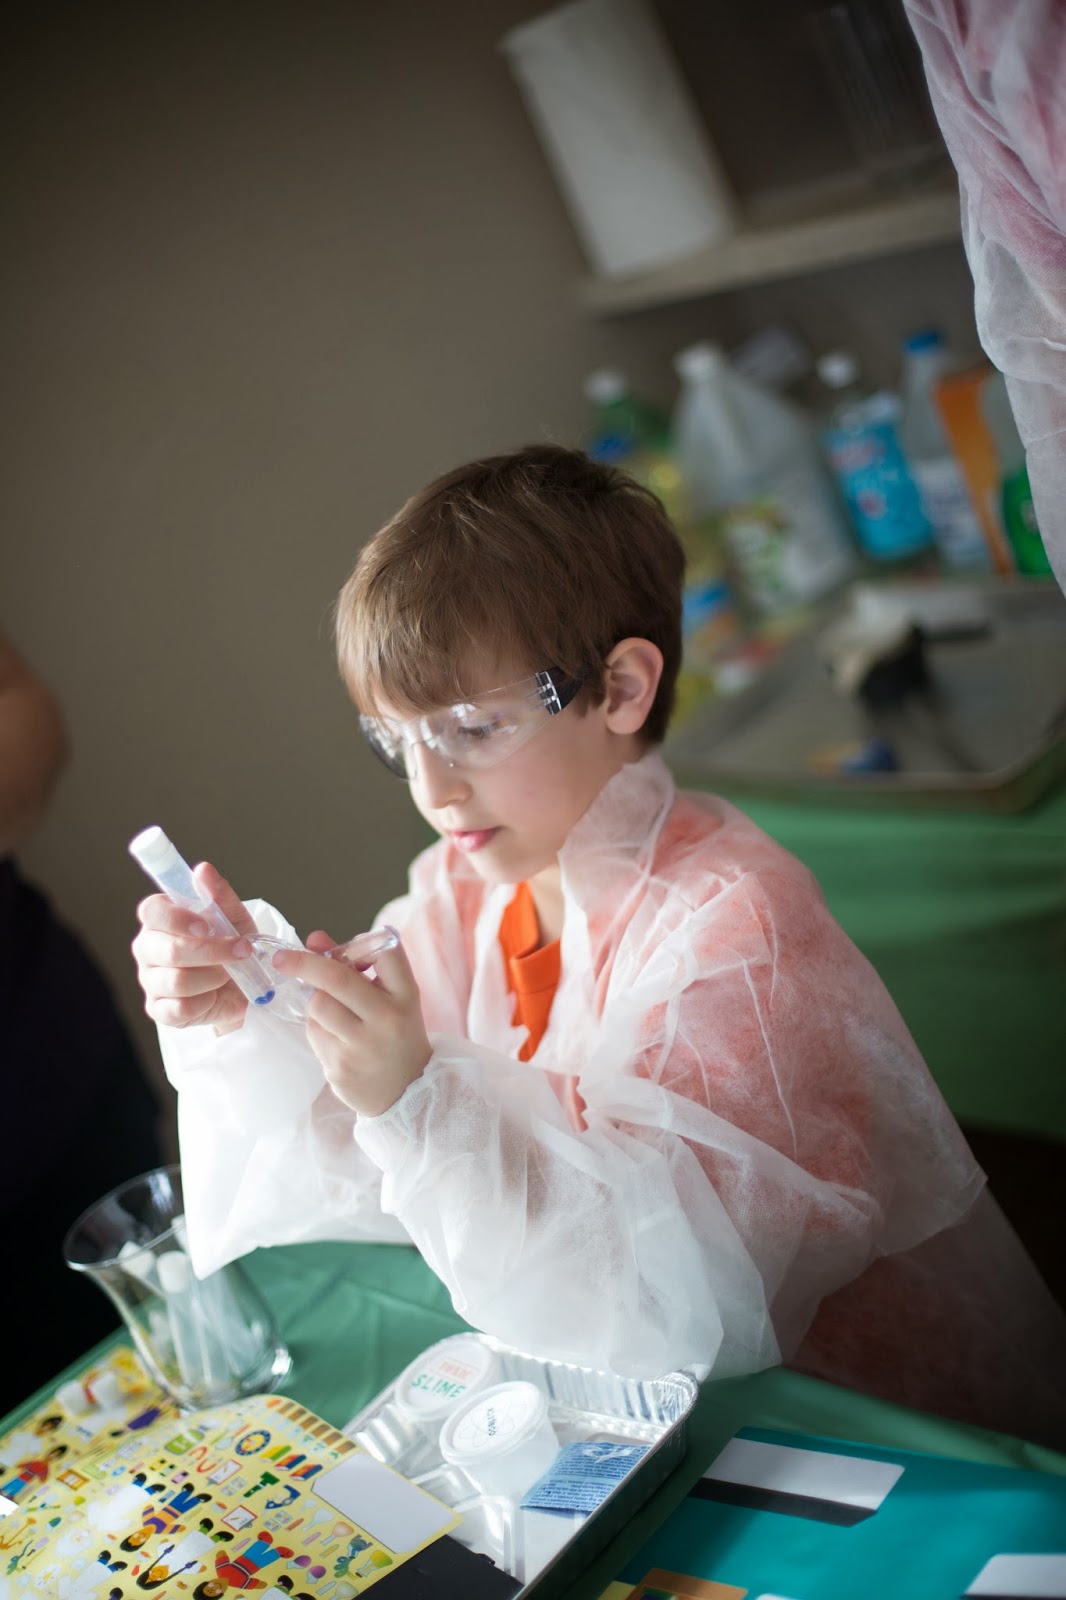
Next, I wanted each guest to have all the necessary scientist supplies for both safety & fun.
As each of our guest arrived, they checked in at the desk with my husband. He entered their name into the computer for clearance, and the computer would say, "Welcome (name). You may now enter the mad science lab."
From there, they would "scan" their hand outside the entrance to the dining room before entering through the hanging table cloth covering the doorway.
We had the whole room sectioned off with a drop cloth from the dollar store. They measure 9'x12', so we needed only one for the length of the room between the kitchen & dining areas. Great deal for just $1!
The Party Table
(pardon the bright lighting on one side of the table)
The party table featured some of the treats and experiments for the party.
The chalkboard sign was made from a piece of black poster board. I was inspired by
Lily Pad Cottage and her creative chalkboard designs. The Science Poster was an affordable find on
Amazon.
Germ Tattoos & Antibiotics (Mike & Ike candy)
The Kids Experiment Table
The Experiment Supply Table
The Cake
What could be more perfect for a Mad Science Party than a Periodic Table of Elements Cake?!?
To pull off this idea, I referenced charts found online and the varied colors use for different types of elements. I then created a template with 3/4" squares filling a page. I printed this out and placed it beneath a sheet of wax paper to use as my template. I piped candy melts onto the wax paper in the various colors. Once this was complete, I placed them in the freezer to set, then arranged them on the frosted cake to match the order of the Periodic Table of Elements. I had high hopes of writing each letter symbol and number notation on them with edible ink markers, but exhaustion from the day won and I opted for sleep instead!
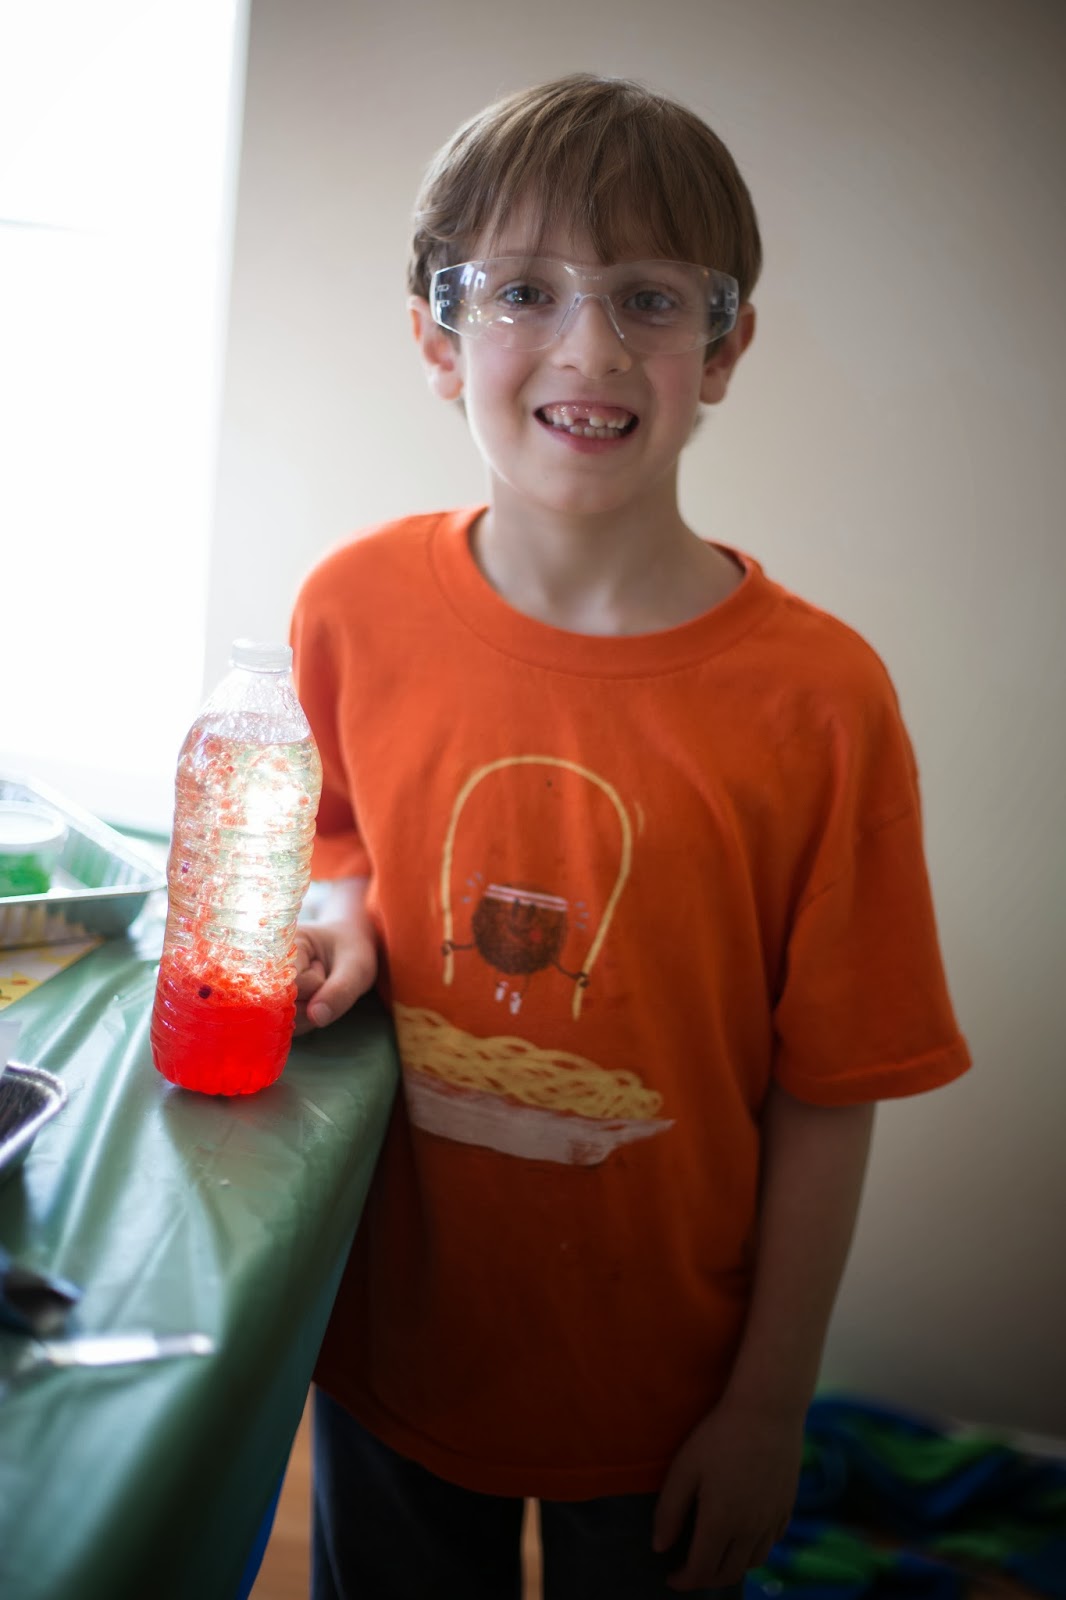
E-I-G-H-T!!!! My baby boy is EIGHT!
(How can this even be? It was just yesterday when he was born in a little German birth house!)
The Treats
The Experiments
I had over a dozen different demonstrations/experiments planned for the party. This kept the party moving along at a productive & fast pace!
1. Gel Orbs in a test tube -- The kids were each given a few gel orbs (the type you would use as decoration in a vase) to place in a test tube. We then added some water to each of the test tubes and through the party they monitored their growth progress using their magnifying glasses.
2. Punch -- I poured a couple containers of apple juice into a punch bowl. With gloves on, each of the kids helped to add dry ice to the bowl. When the dry ice had fully dissolved, we enjoyed drinking our lightly carbonated punch!
3. Oobleck -- Mad from cornstarch and water, his non-Newtonian fluid acts as both a liquid and a solid. Instructions
here. It was fun watching the kids attempt to stir the mixture, only to discover that using their hands was the best method! The put a bit of the mixture in a container to take home.
4. Egg in a bottle -- We demonstrated how with a change of air pressure how a hard boiled egg could be sucked into a bottle. Instructions
here. (sadly no picture, sorry!)
5. Taste Test Challenge -- Each of the kids took turns tasting samples of lemons, limes, oranges & grapefruit to see how sour each tasted. We then had the kids dissolve a frooties tablet on their tongue. They were quite surprised when each of these now tasted sweet!
6. Slime -- Honestly, what boy doesn't love slime?!? This simple to make mixture just needs water, glitter glue (or regular glue), and borax. We make enough for all the kids to take home their own container. Instructions
here. (yup, missing another picture!)
7. Cloud in a Jar -- What happens when hot and cold air collide? A cloud! Instructions
here.
8. Elephant Toothpaste -- It's important that your pet elephant have a high quality, big and foamy toothpaste. Nothing else will do! This produces quick foaming thick bubbles, lots of fun! Instructions
here. (this photo was taken after the foam had been sitting awhile)
.
9. Cabbage Litmus -- By boiling down red cabbage, you are left with a deep purple liquid. This liquid is perfect for measuring the acidity of various chemicals & liquids. The chemical reactions cause dramatic color changes definitely will impress! We tested lemon juice, ammonia, washing soda, baking soda, seltzer, vinegar, lemon-lime soda, and water. Instructions
here.
10. Lava Lamps -- My son LOVES lava lamps! So making our own was a lot of fun! All you need is a water bottle, oil, water, food coloring & some alka seltzer tablets. Instructions
here.
11. Baking Soda Bombs -- The night before the party I mixed baking soda with a bit of water to make a paste type mixture. I then took little bugs and packed them into little balls of the mixture. I baked them in the oven for 15-20 mins at 200 degrees Fahrenheit to dry. The kids dropped each of the balls in a large pan of vinegar to watch them fizz and dissolve and reveal their bugs!
12. Fizz-Inflators -- These were the hit of the party! Using a water bottle, vinegar, baking soda & balloon you can make one amazing Fizz-Inflator! You pour a 1/2c. vinegar in the water bottle, and the fill the balloon about 1/2 way with baking soda (a funnel really helps with this!). You then carefully place the balloon on top of the water bottle. Be careful not to dump any baking soda into the bottle! Lift up the balloon and watch the balloon inflate! Instructions
here.
13. Mentos Explosion! A Mentos Diet Coke Geyser is the perfect way to end a fun party! Instructions
here.
Presents!!!